How To Adjust Rear Brakes On A Motorcycle: Drum-Type Brake Adjustments
This page was last updated on 06-Jan-2025 07:09pm , By Saleh
Proper adjustment of the braking system is very important for the safety and performance of a motorcycle. While many modern motorcycles feature hydraulic disc brakes, some models are still equipped with drum-type brakes on the rear wheel. Like hydraulic disc brakes, drum brakes also require periodic adjustments to maintain optimum braking performance. So here we have featured how to adjust the rear brakes on a motorcycle and describing drum-type brake adjustments.
How to Adjust Rear Brakes on a Motorcycle:

Drum-type brakes are a common type of rear brake system found on many motorcycles, especially in the commuter category. Although drum brakes are not as efficient as disc brakes, they are still an effective and low-cost solution as a motorcycle braking system. However, adjusting the rear drum brakes on your motorcycle is a relatively straightforward process that can be done at home with basic tools and some patience. So here we have the step-by-step procedure.
Gather The Necessary Tools
Before you begin adjusting the rear drum brakes of your motorcycle, gather the necessary tools for the job. Typically, you will require a socket set or wrenches, a flat-head screwdriver, a brake adjusting tool (commonly known as a brake spoon), and a clean cotton rag or shop towel. For maintenance work, consider a well-ventilated and properly illuminated place where you need to keep the motorcycle standing on the center stand or pit stand, making the rear wheel free of the ground.

Locate And Open The Rear Drum Brake Assembly
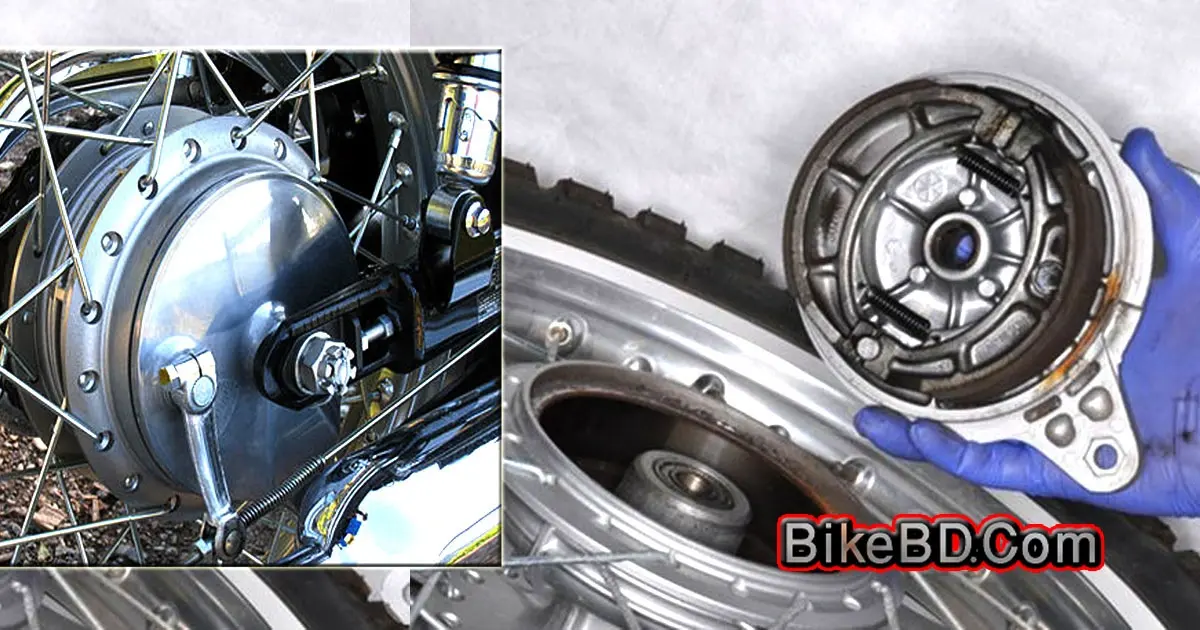
The rear drum brake assembly is usually located on the rear wheel hub of the motorcycle. So you need to remove the rear wheel first. Then open the cover from the round drum-shaped component attached to the wheel hub. Here you will find the brake assembly fixed on the drum cover, and the wheel hub itself works as the brake drum.
Inspect The Brake Shoes And The Drum
After opening the drum brake cover, thoroughly inspect the brake shoes for signs of wear or damage. If the brake shoes are worn beyond the manufacturer's recommended limits or damaged, they should be replaced. Also, inspect the brake drum, lever, and tension springs attached to the brake shoes, and clean off the dust and dirt from both the drum and brake shoe assembly. If necessary, remove everything and reattach with accurate adjustment, and don't forget to maintain a free-play between the brake shoes and the drum surface.

Loosen And Adjust The Brake Adjuster
After cleaning everything inside the brake drum, locate the brake adjuster mechanism outside the brake assembly. It's simply a lever that pulls both brake shoes outward. It needs to be adjusted to determine how much it will pull the shoes inside. You can adjust it by changing its position, simply by loosening the locknut. Remember to maintain a minimum amount of free play.
Reinstall The Brake Drum Cover
After cleaning everything inside the brake drum and shoe assembly, reinstall the drum onto the wheel hub. Then, check the free-play and ensure that the wheel spins freely without any drag from the shoes. If necessary, make fine adjustments and then reinstall the wheel. Check the functionality by pressing the brake lever several times.
Take A Test Ride And Check Everything
Once you are satisfied with the brake shoe adjustment, reassemble all the components you removed to access the brake assembly. Ensure that all fasteners are securely tightened. Before riding the motorcycle, test the brakes again by riding in a safe area and ensure that they are functioning correctly.
So, these are the steps to adjust the rear brakes on a motorcycle equipped with a drum-type braking system at the rear. It's as simple as that. Therefore, regularly inspect and adjust the brakes of your motorcycle to ensure optimal braking performance and your safety on the road every time.


