How To Fix Pinholes In Motorcycle Gas Tanks?
This page was last updated on 05-Jan-2025 09:49pm , By Saleh
How To Fix Pinholes In Motorcycle Gas Tanks Details:
Motorcycle enthusiasts know the importance of a well-maintained motorcycle. A well-maintained motorcycle not only performs great but also provides smoother service for a longer period. However, for many reasons, a motorcycle gas tank can develop pinholes and cause gas leakage, which not only leads to fuel wastage but also poses a safety hazard. Therefore, it is crucial to fix pinholes in motorcycle gas tanks as quickly as possible. Here, we will describe the detailed process of fixing pinholes in motorcycle gas tanks.
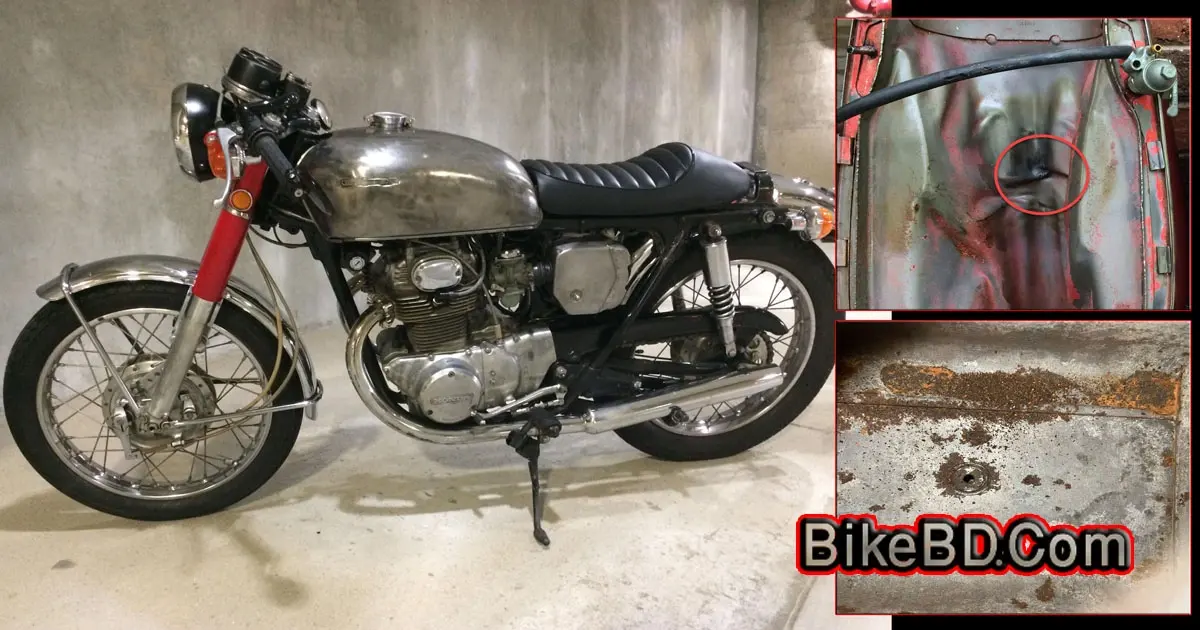
How To Fix Pinholes In Motorcycle Gas Tanks?
For a responsible and serious motorcycle rider, a well-maintained motorcycle is always desired. However, a pinhole in a gas tank is not an uncommon issue, especially in the case of older motorcycles. You see, a motorcycle gas tank plays a critical role in fuel storage and must be free from leaks or pinholes that could lead to potential dangers.
So, a pinhole in a motorcycle gas tank is indeed a frustrating issue for riders. However, pinholes in a motorcycle gas tank can arise from various causes, including rust, corrosion, or accidental damage. The good news is that pinholes in a gas tank are quite easily repairable, and you can do it at home. Therefore, we will guide you through the process of fixing pinholes in your motorcycle gas tank. Stick with us.

Preparation For Fixing The Pinhole In The Motorcycle Gas Tank
To fix the pinhole in the gas tank of a motorcycle, you will first need to gather the necessary tools and materials. You may require items such as a cleaning cloth or rag, a degreasing agent, sandpaper or a sanding block (medium to fine grit), epoxy putty or a metal filler compound, fiberglass cloth or a patch, epoxy resin, and automotive-grade paint material. It is also important to have safety gloves and goggles to ensure your safety during work.
Before starting any repair work, prioritizing your safety is crucial. Therefore, you should wear protective gloves and goggles to shield your hands and eyes from harmful chemicals and debris. Additionally, make sure that the motorcycle is parked in a well-ventilated and brightly illuminated area, and that the workspace has adequate airflow to avoid inhaling toxic fumes.

Start Fixing The Pinhole In The Motorcycle Gas Tank
To begin the repair work, thoroughly clean the motorcycle and remove the gas tank from the motorcycle. Then, carefully drain the gas tank completely to avoid any potential mishaps and clean the tank from dirt, rust, and worn paint. Next, conduct a thorough inspection of the gas tank to identify the exact location and size of the pinholes. Clean the affected area and remove any dirt, grime, or loose debris using sandpaper or a sanding block.
Also Read: Luyuan MYC Price In Bangladesh
Be cautious not to damage the surrounding paintwork or expose more of the tank to the pinholes. Once you have cleaned the tank, wipe the area with a clean cloth to remove any remaining debris. To effectively seal the pinholes, apply epoxy putty or a filler compound. Make sure that the putty or epoxy covers the entire affected area, extending slightly beyond the pinholes. Smooth out the putty or epoxy using a putty knife, leveling it with the surrounding surface. Allow it to cure according to the manufacturer's instructions.
Adding Reinforcement With Fiberglass Work
After fixing the pinhole with metal putty, it is recommended to reinforce the repaired area with a layer of fiberglass. To do this, get a piece of fiberglass that is slightly larger than the repaired section. Apply the fiberglass over the cured putty or epoxy, pressing it firmly and ensuring it is thoroughly saturated with the provided resin or adhesive. Allow sufficient time for saturation and complete drying.
Finishing With Paintwork On The Motorcycle Gas Tank
Once the fiberglass repair has dried, it is necessary to smooth the surface and proceed with painting. Use sandpaper to level the area until it matches the surrounding surface. Wipe away any dust or debris. Apply a thin layer of automotive-grade primer to the repaired section and let it dry completely. Gently sand the primarily finished area with fine-grit sandpaper for a smooth finish.
Also Read: Fidato Evtech Easy Go Price In BD - BikeBD
Now, the fuel tank is ready for the final finish with gasoline-resistant paint that matches the gas tank color. Apply the matching paint color in thin, even coats, and allow each coat to dry before applying the next. Finally, apply a clear hardener coat to protect the paintwork and provide a glossy finish. Once the paint is dry with a smooth and shiny finish, you are done fixing the pinhole in your motorcycle fuel tank and your motorcycle is ready to hit the road again. Cheers!


